If you generate AI images regularly, you’ve probably run into this situation: the image is almost perfect — but the clothes are wrong, the face looks strange, or the background doesn’t fit.
Regenerating the whole image from scratch is slow and unpredictable.
This is exactly where AI inpainting becomes extremely useful.
With the AI InPaint tool, you don’t recreate the entire image. Instead, you select a specific area, and the AI redraws only that part while keeping everything else unchanged.
In this guide you’ll learn:
What AI inpainting actually does
How to use the InPaint tool step by step
How the denoising parameter works
The best models for AI inpainting
Practical examples (clothes, hair, faces, background)
An advanced trick most users don’t know
Let’s go step by step.
AI inpainting is an image editing technique powered by neural networks.
Instead of generating a completely new image, you select a specific area you want to modify, describe what should appear there, and the AI redraws only that region.
Everything outside your selection remains unchanged.
This makes the AI InPaint tool perfect for tasks like:
Changing clothes on an AI image
Fixing faces
Replacing backgrounds
Editing hair or body details
Converting realism into anime style
Updating older generations with newer models
In many cases, AI inpainting is faster and more precise than regenerating the whole image.

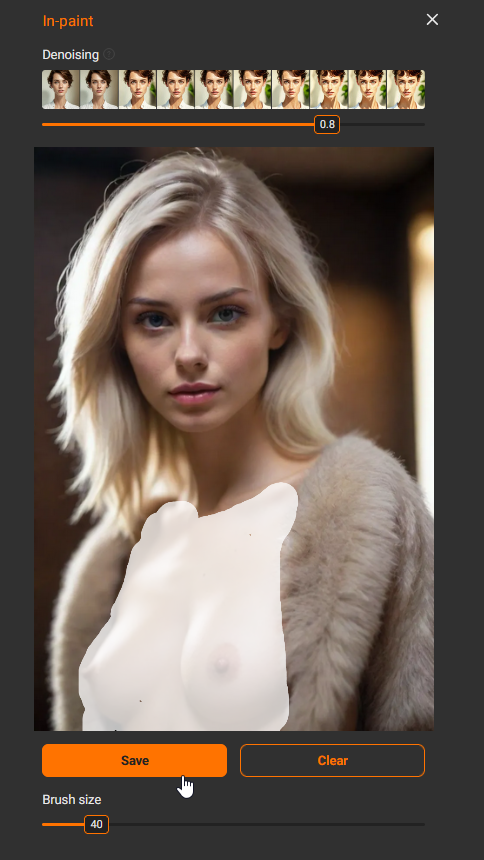
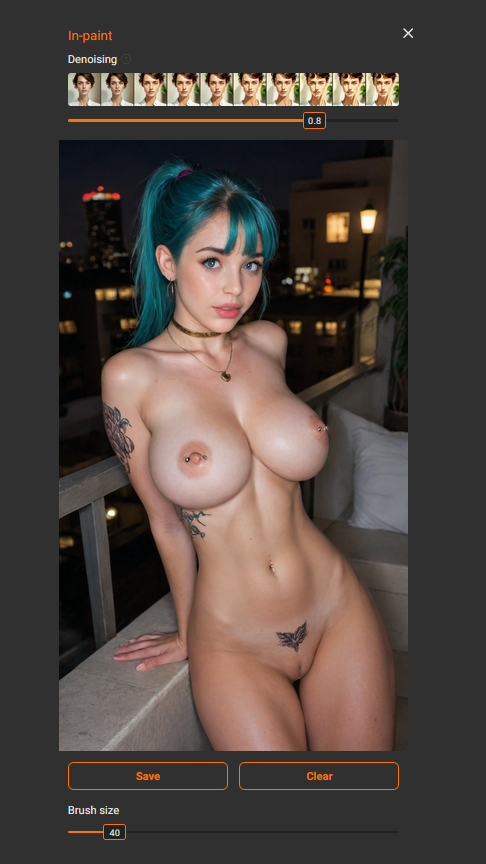
First, choose an image from the galeri that you want to edit, or generate a new one. Click the image and select the Inpaint option.
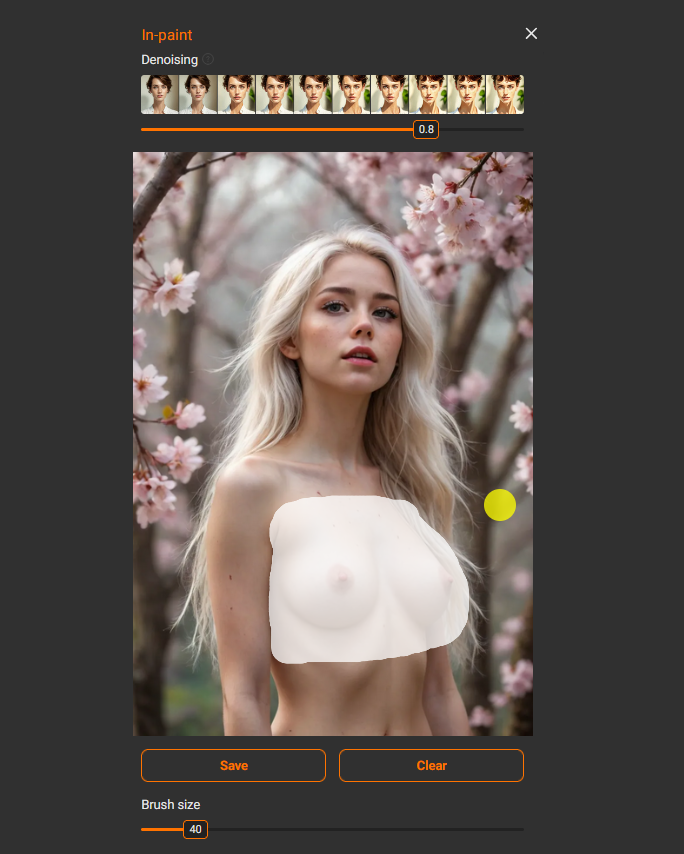
When you open the AI InPaint tool, you will see the image and a brush.
The main visual setting here is Brush Size. It simply controls how large your selection brush is.
💡 Tip: always select a slightly larger area than the exact part you want to change.
If the selection is too tight, the AI doesn’t understand the surrounding context. This can lead to visible seams, unnatural edges, or lighting inconsistencies.
Giving the AI a little extra space allows it to create more natural results.
Also remember to press Save after selecting or removing an area. Many beginners forget this step and wonder why inpainting doesn’t work.
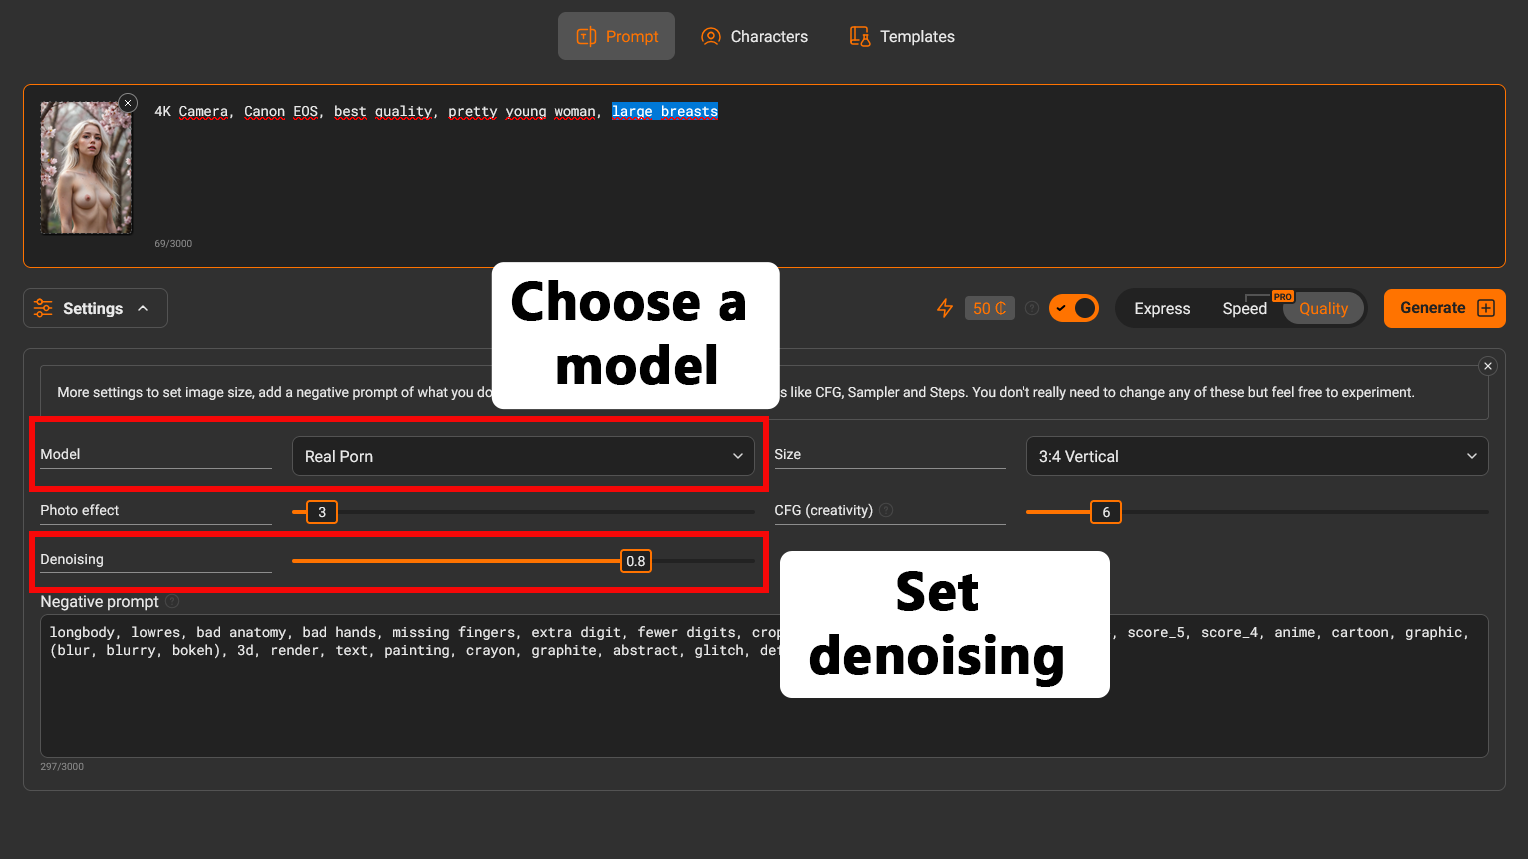
The model you choose has a bigger impact on the result than most settings.
For realistic images use:
Gerçek Porno
Real Porn Pony
Real Porn Illustrious
For anime images use:
Anime Desire
Anime Desire Pony
Anime Desire Illustrious
These models provide the most stable results when editing images with the InPaint tool.
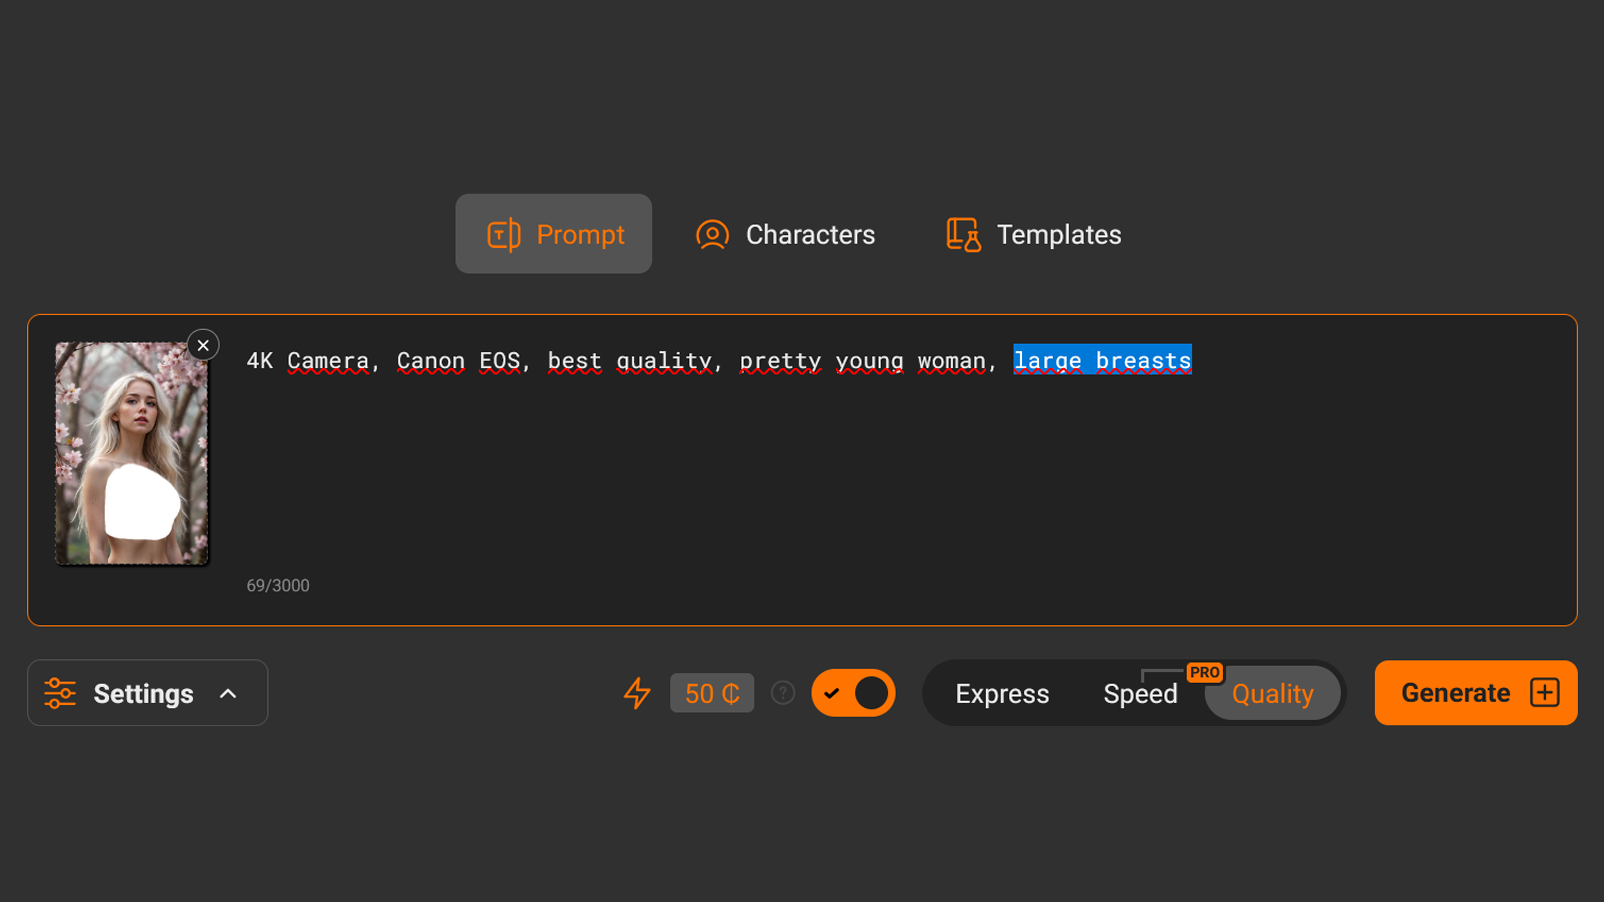
When using AI inpainting, your prompt should describe only what you want inside the selected area.
There is no need to rewrite the entire scene.
Examples:
changing clothes: black t-shirt
changing hair: long red hair, straight
replacing background: neon city at night
fixing a face: beautiful face, natural skin, soft lighting
Keep prompts simple. Usually 3–10 words are enough.
Bu denoising parameter determines how strongly the AI changes the selected area.
You can think of it as the intensity of the edit.
Here is how it works:
0.1 — almost no change
0.5 – 0.65 — small corrections
0.65 – 0.85 — balanced editing
0.95 — almost full redraw
1.0 — complete regeneration of the selected area
If you are not sure what value to use, start with 0.75–0.85.
Use higher values when:
Changing style
Replacing background or clothing
Converting realism into anime
Use lower values when making small corrections such as fixing faces.
Just like normal image generation, inpainting is still random.
Never judge the result from a single generation.
Basın Oluşturmak several times. Creating 3–6 variations is normal.
Very often the third or fourth result will look much better than the first.
Trying different denoising values can also dramatically improve the outcome.
Below are several examples of how the AI InPaint tool can be used in real situations.
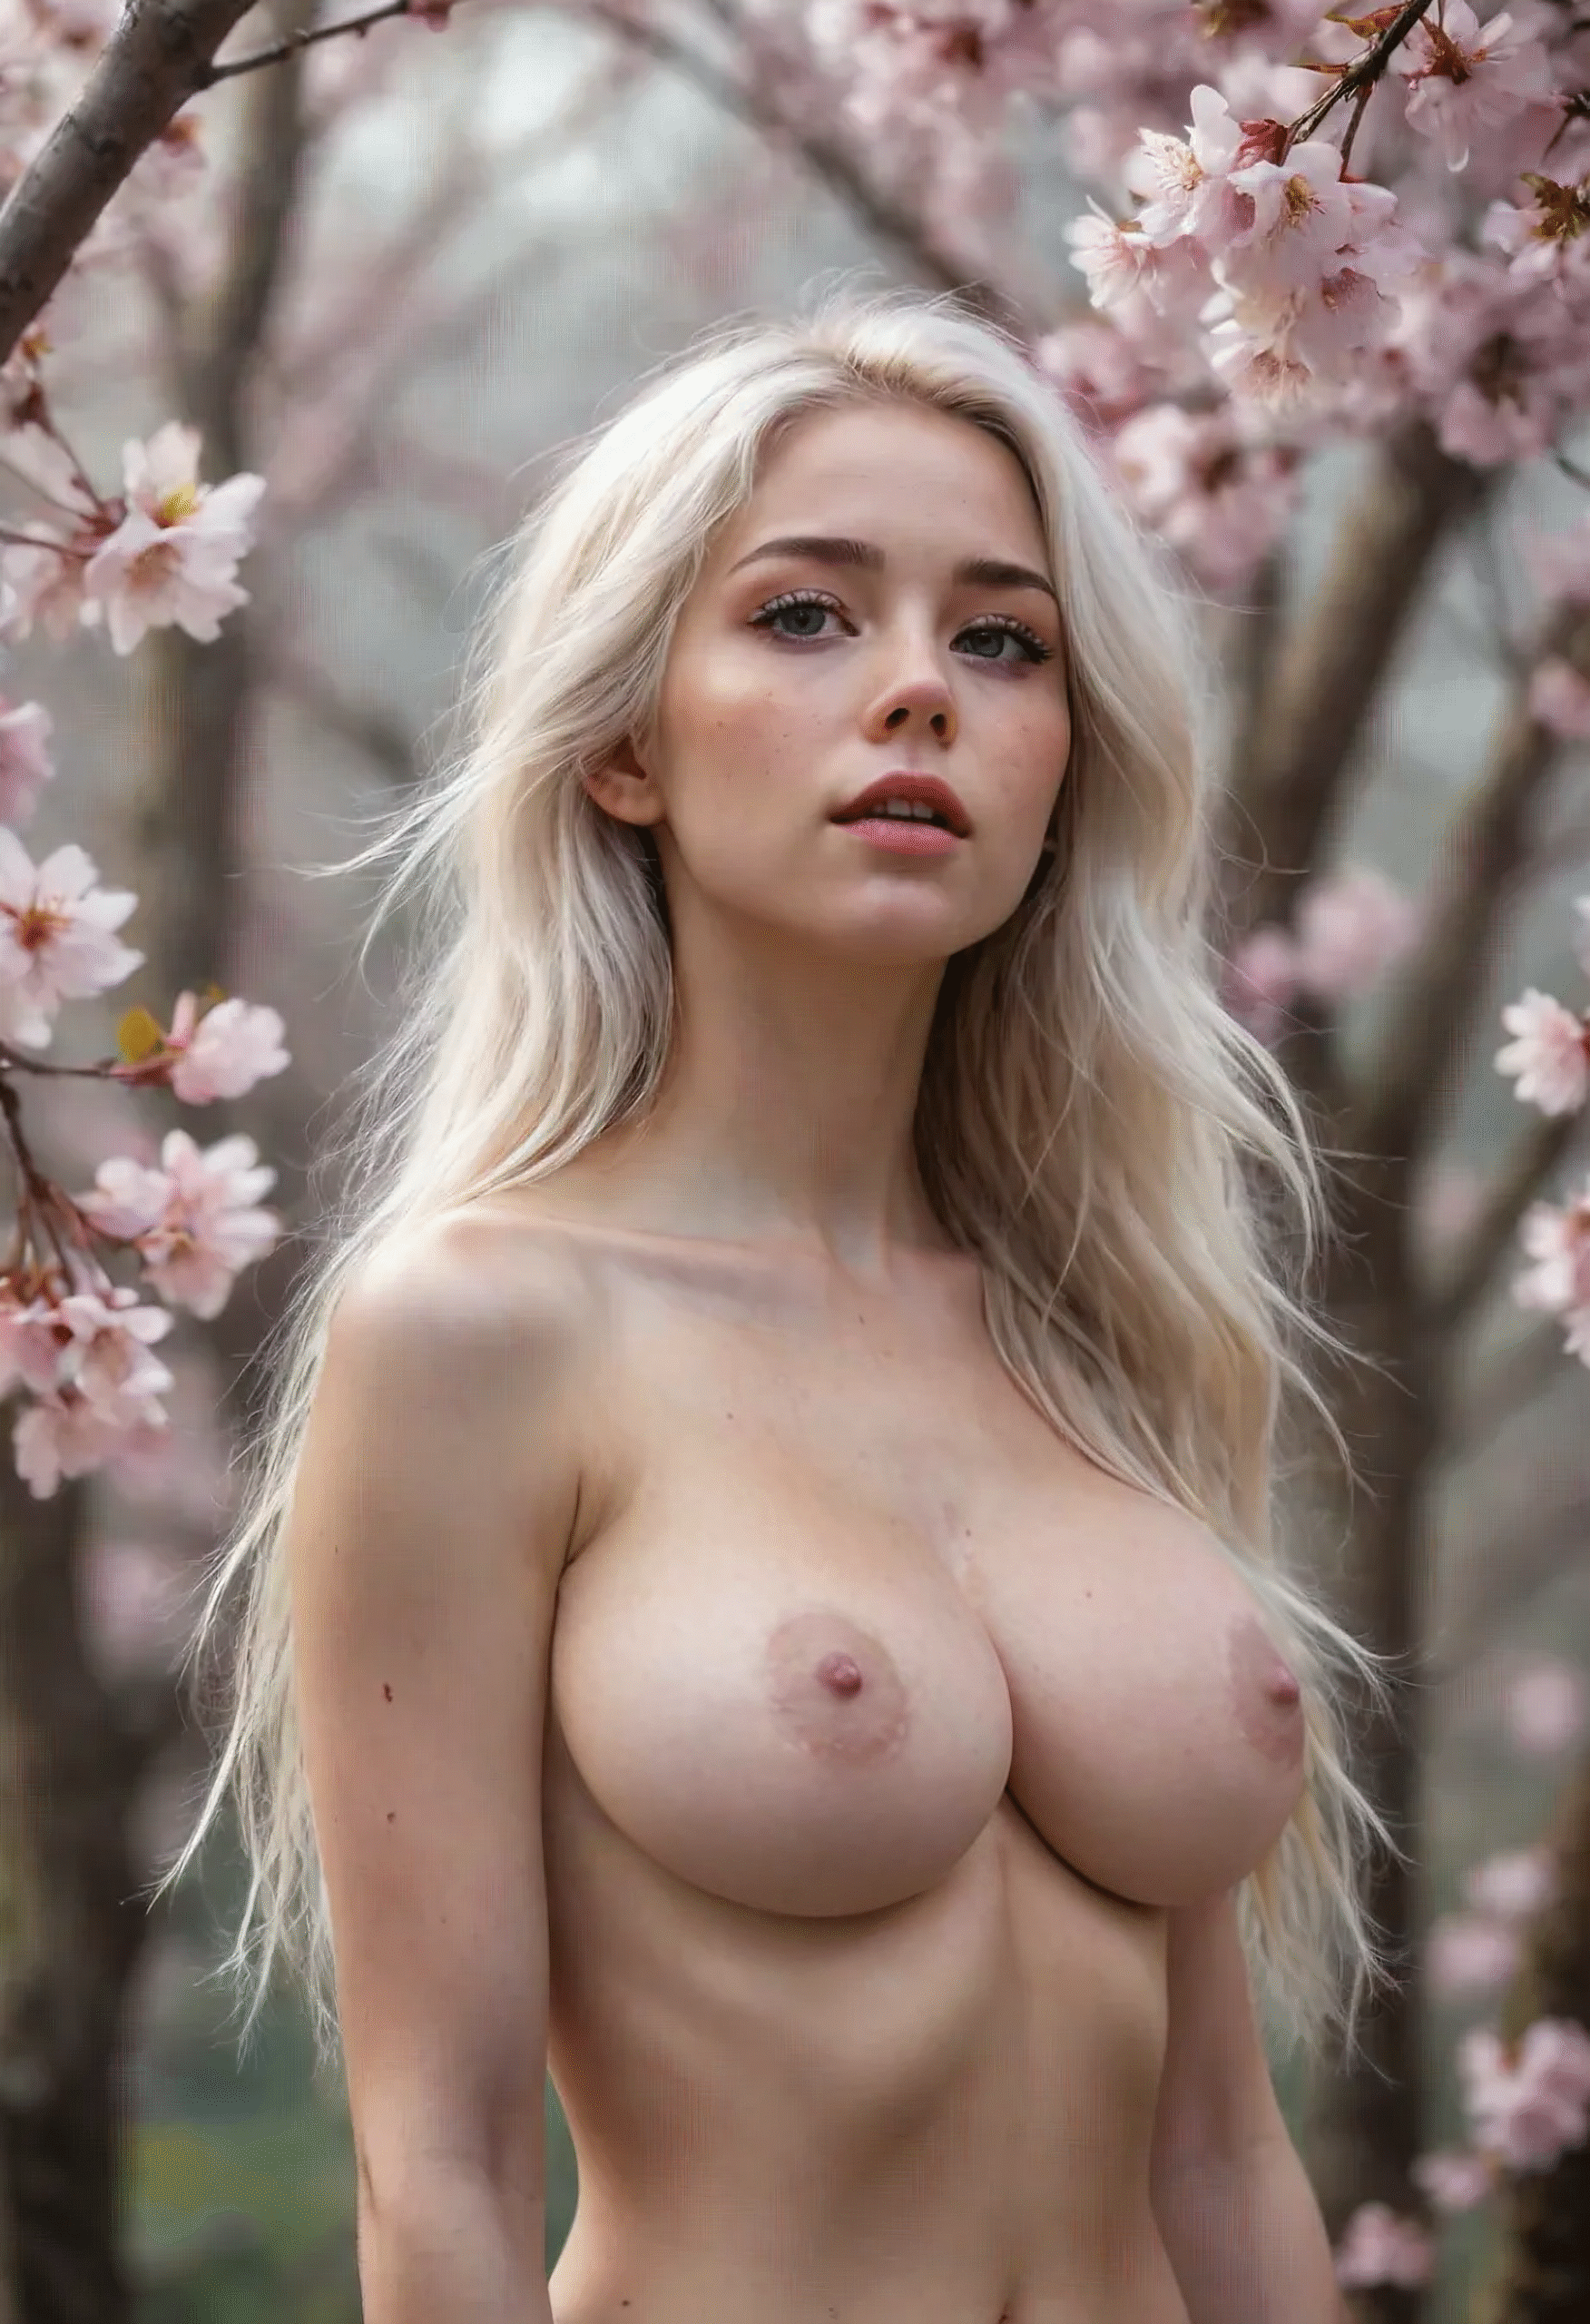
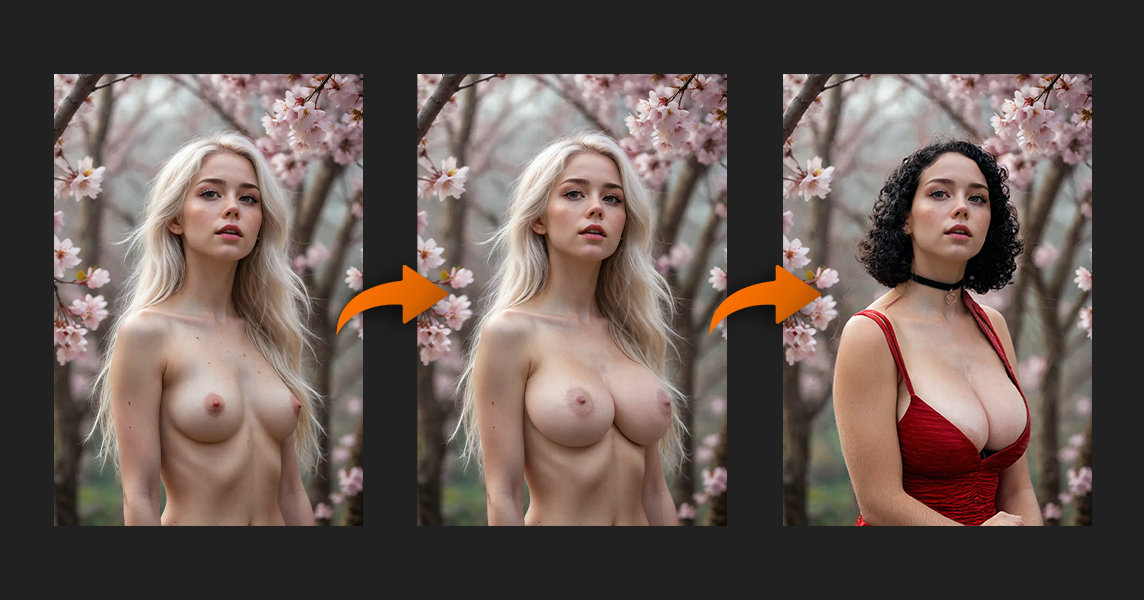
Let’s start with an image we already selected.
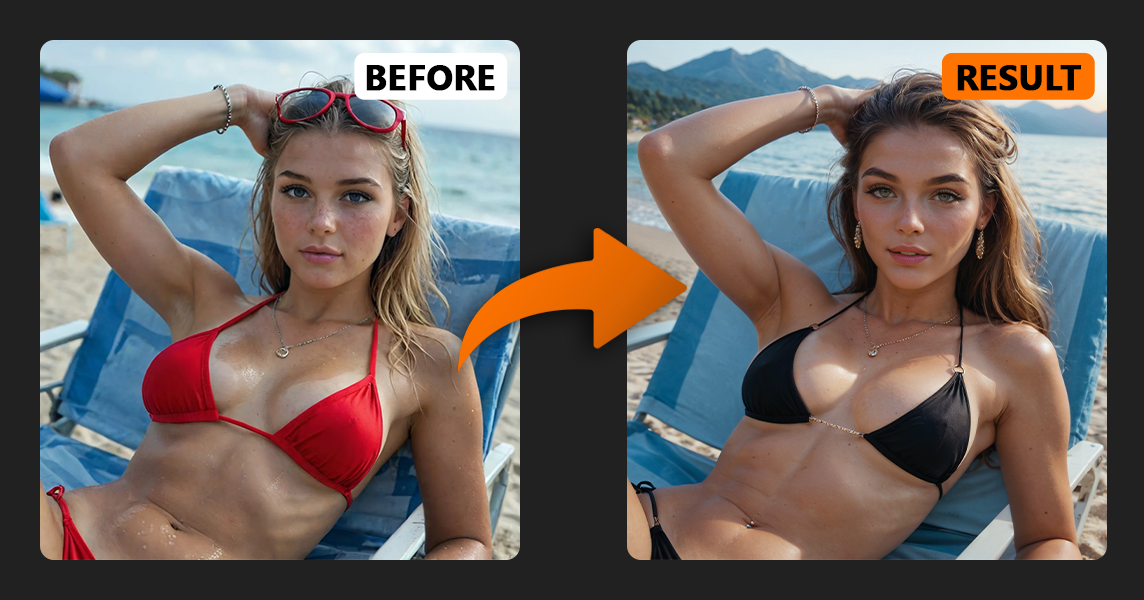
First, we’ll try increasing the girl’s breast size.
I enter “large breasts” in the prompt and test different denoising values from 0.7 to 0.95. The best result appears around 0.8.
Now let’s try dressing her in a red dress.
I select a new area and write “red dress, cleavage”. Lowering denoising slightly to 0.75 produced better results.
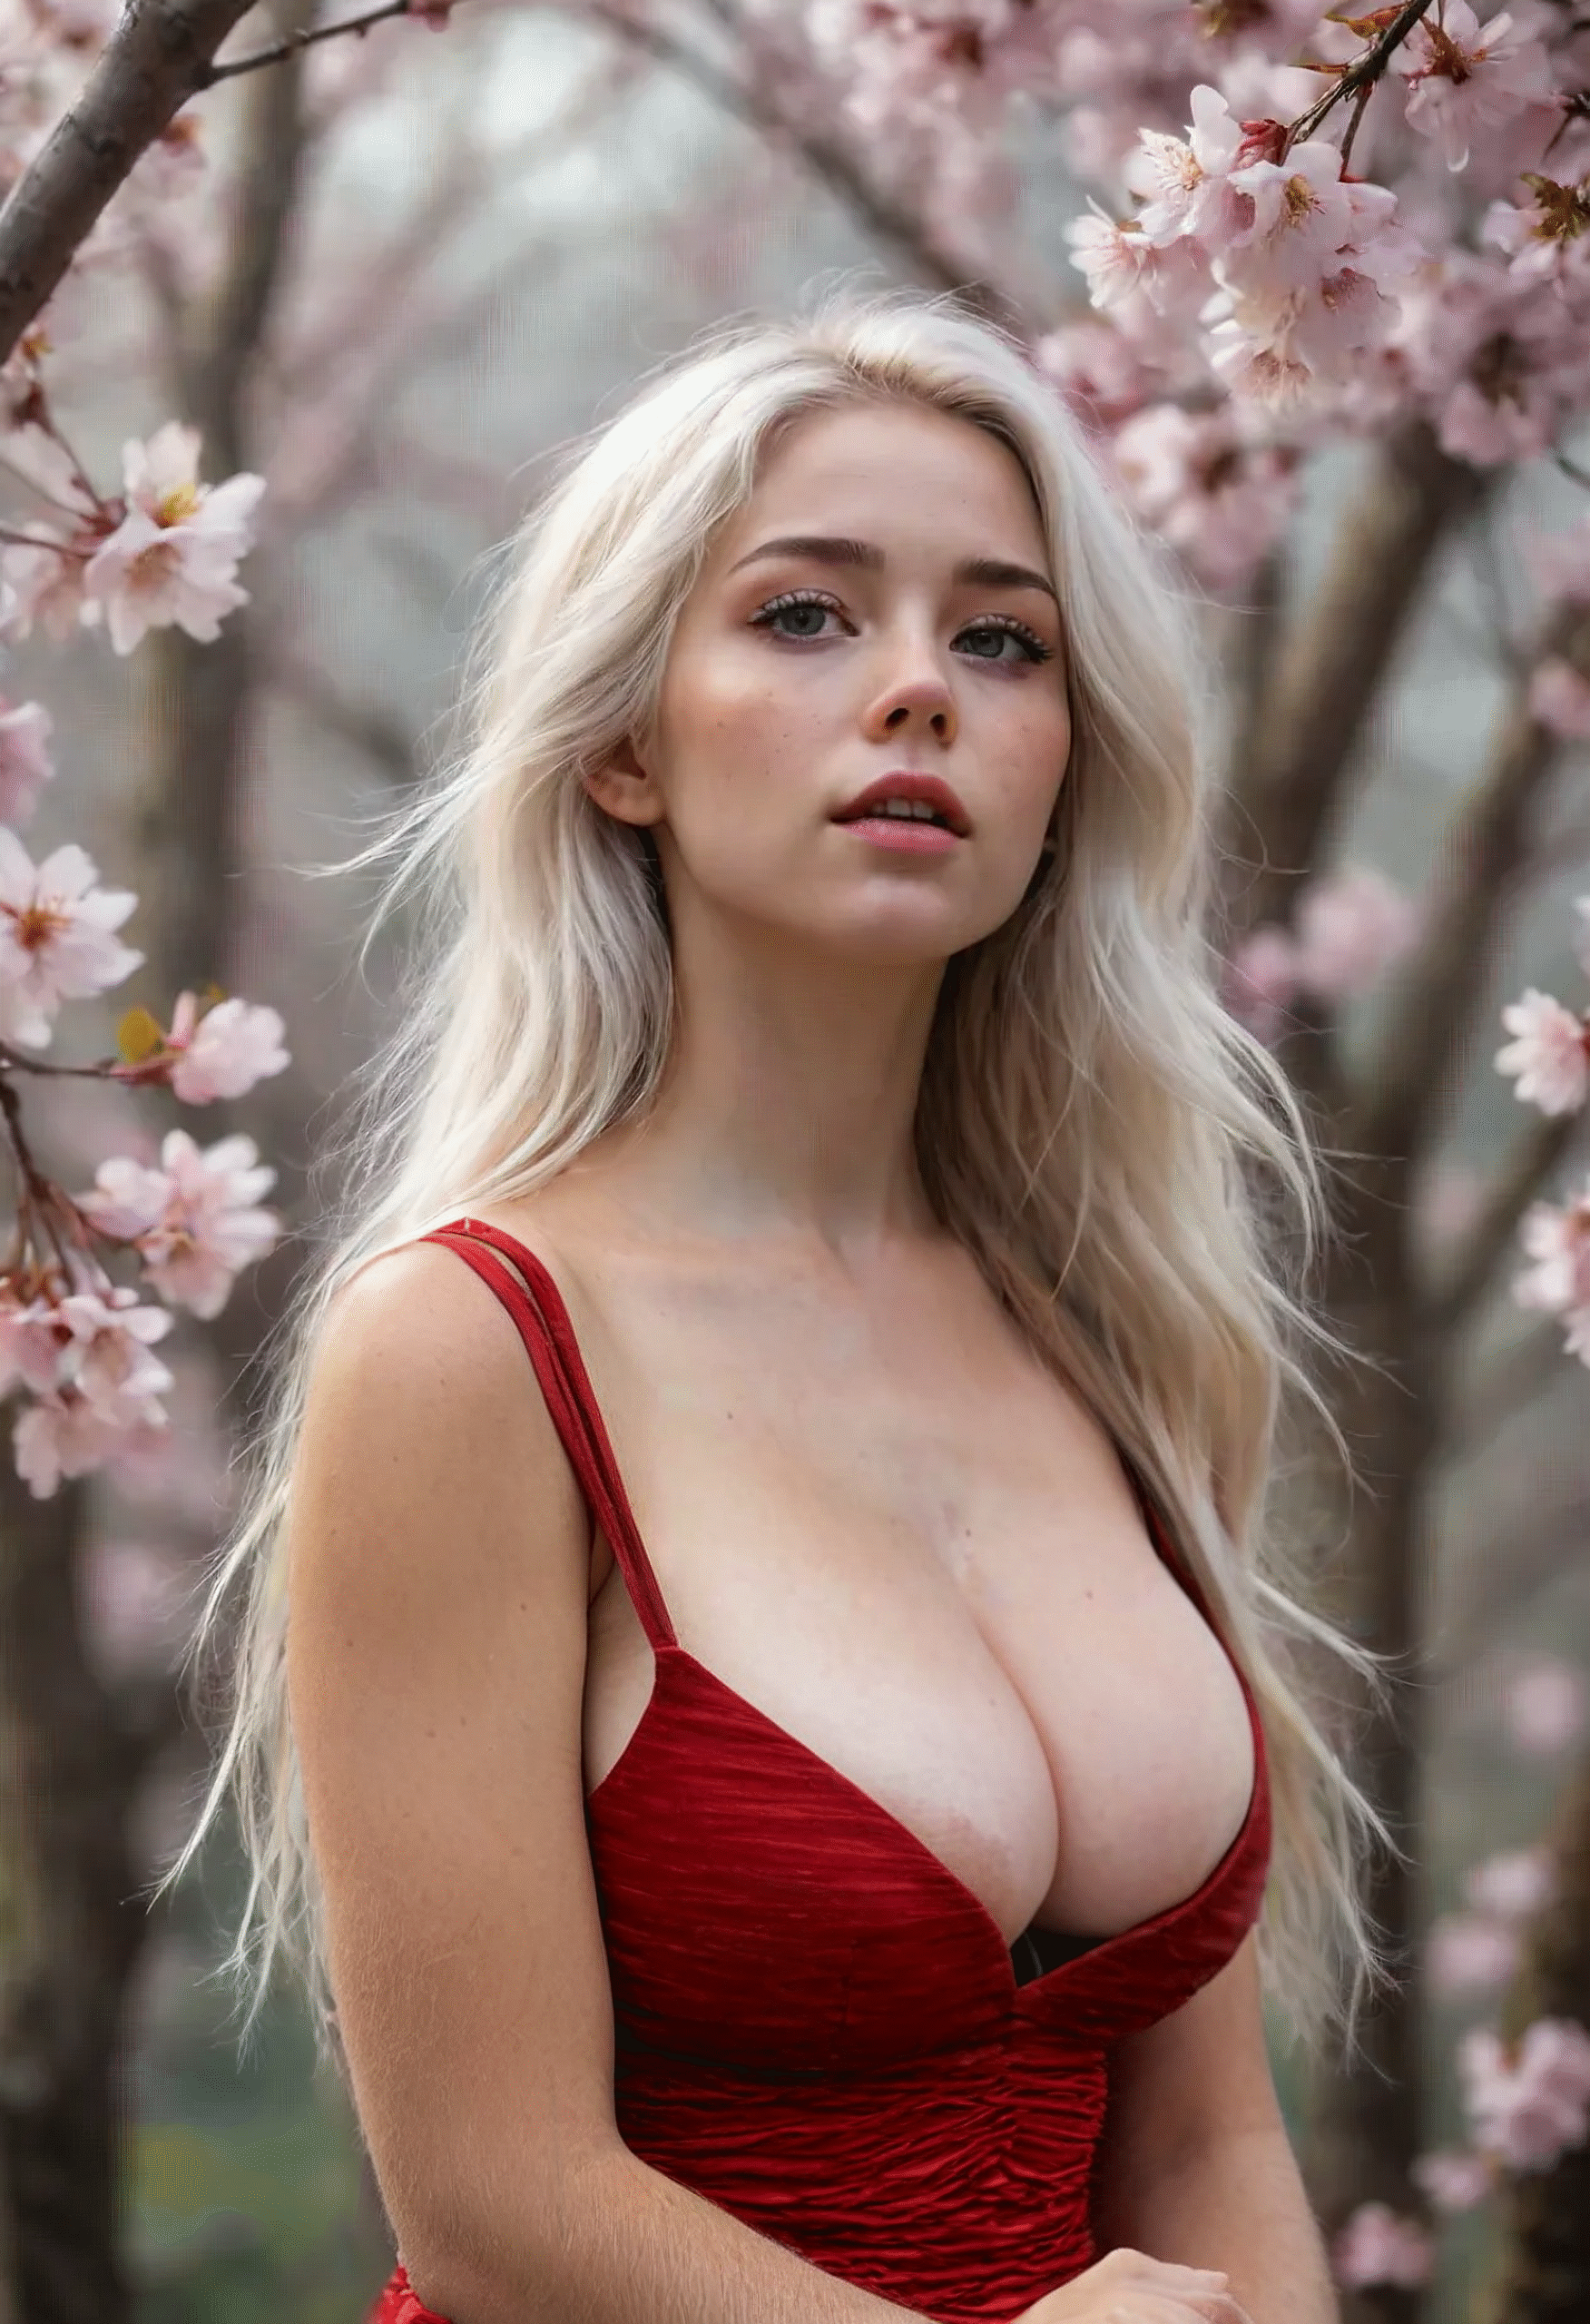
Finally, we change her hairstyle to a black bob using the prompt:
“black hair, bob cut hair, curly hair”
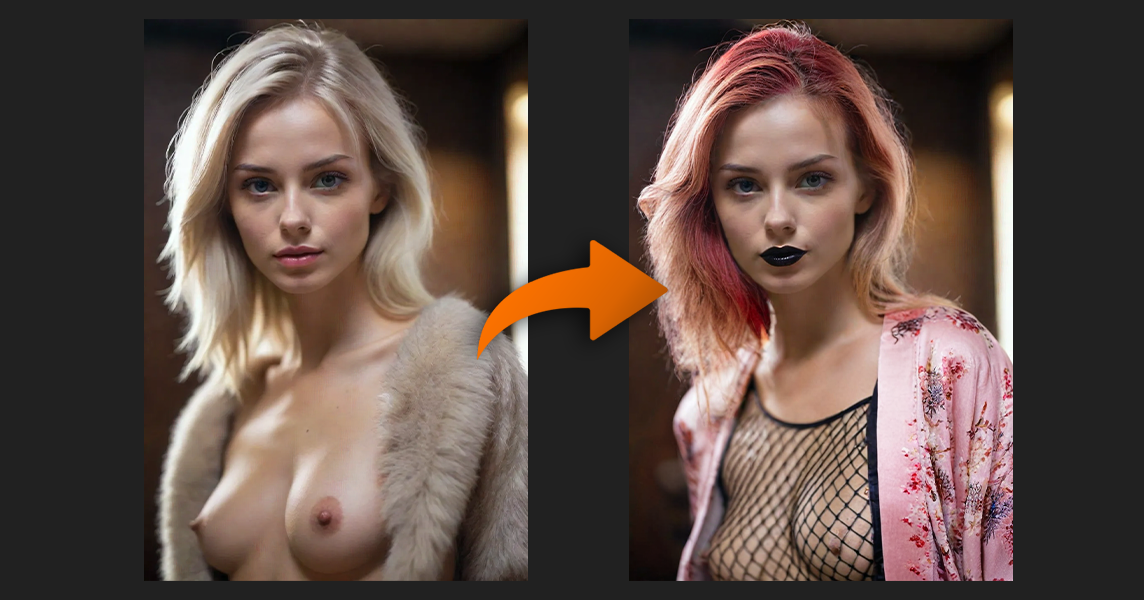
Let’s take another image from the gallery.
I select an area and try adding something interesting — for example a fishnet pattern on the chest.
After that, I follow the same workflow: select area → write prompt → test different models and denoising values.
Next I:
changed the hair color to red
changed the lips to black
dressed her in a kimono
Here is the final result.
Here is a technique many users don’t know about.
If you don’t select any area, the AI InPaint tool can regenerate the entire image while preserving the overall composition.
How to do it:
Leave the selection empty
Switch to a stronger model
Set denoising to 0.95–1.0
Generate multiple variations
This is perfect when:
You like the composition but the face looks bad
The image was created with an older model
You want higher detail without changing the original concept
You can think of it as an upgrade pass.
Let’s try it with an image from the gallery.
Open Inpaint, leave the selection empty, and press Save.
Then set denoising between 0.85 and 1.0 so the whole image is regenerated.
Here is the result using the Gerçek Porno & Anime Desire Illustrious model.
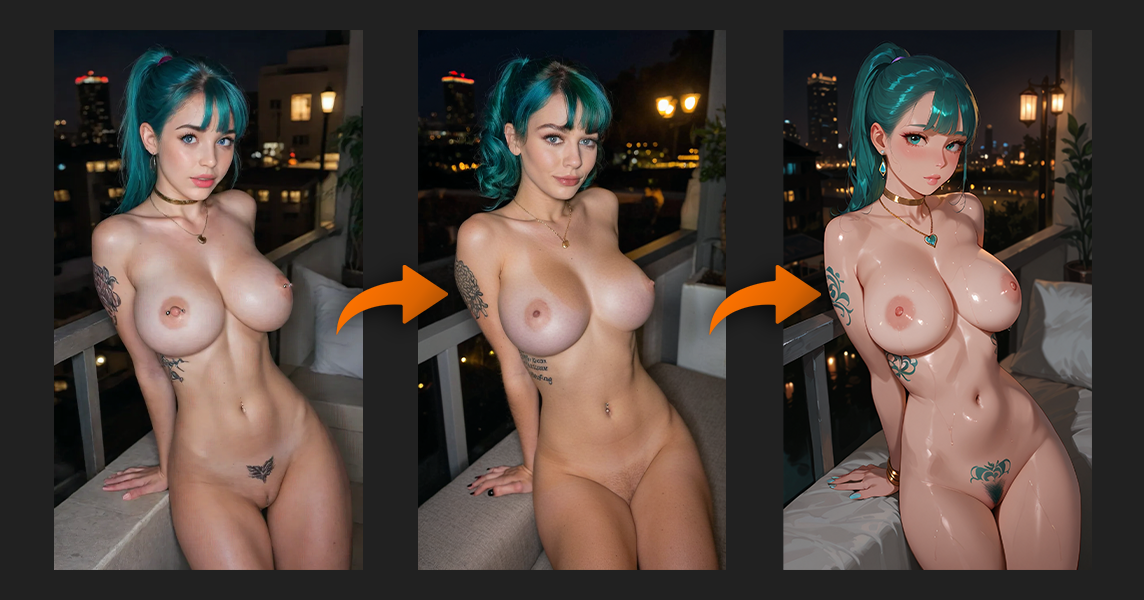
After that you can go even further:
convert the image to anime style
recolor the hair
change the background
regenerate the image again
The InPaint tool becomes a universal editing tool for AI images.

Some common mistakes when using inpainting include:
Forgetting to press Save after selecting an area
Selecting an area that is too small
Using the wrong model for the chosen style
Setting denoising too low for major changes
Generating only one variation
Avoid these mistakes and the quality of your results will improve significantly.
Use AI inpainting when you want to:
Change clothing without losing the pose
Fix faces or body details
Replace backgrounds
Upgrade older generations
Change the visual style of an image
Make small targeted edits instead of regenerating everything
If an image is already 80% good, don’t regenerate it.
Kullanım AI inpainting to refine the parts that need improvement.
Bu AI InPaint tool is one of the most powerful image editing tools available in modern AI image generation.
Once you understand three key principles:
Choosing the right model
Using denoising correctly
Selecting slightly larger areas for editing
— you gain much greater control over your results.
Combine AI inpainting with strong prompts and LoRA models, generate several variations, and refine images step by step.
That’s how experienced users achieve consistent high-quality generations.
Mastering AI inpainting is all about understanding how small, targeted changes can dramatically improve your images. Instead of regenerating everything from scratch, you learn to work with the image you already have — adjusting only the parts that need improvement.
By choosing the right model, using denoising correctly, and selecting slightly larger areas for editing, you move from random corrections to precise image control.
Your next step: take one of your existing generations and try improving it using the InPaint tool — change the clothes, fix the face, or experiment with a different hairstyle. Compare the result with the original and see how much more control you gain.
And join our challenges on Discord. We have both weekly and daily events in the image and video categories. You can win credits, PRO subscriptions, recognition, and sometimes even money.
If you want to improve your AI generations even further, check out our other guides:
• Beginner guide to AI image generation
Learn how prompts, models and settings work together.
• LoRA templates guide
Understand how LoRA models can change poses, styles and characters.
• How to improve your AI generations
Advanced tips to get more consistent and detailed results.